


Homemade Cherry Danishes
When your coffee demands a sweet treat, have some fresh-baked cherry Danish. This simple recipe is made with canned pie filling, and comes together quickly after an overnight rise.
When a cherry Danish craving strikes, all you need is a little time and a good recipe, and for that we’ve got you covered. Homemade pastries honestly don’t take much more effort than any other dessert (often less!). They just feel a little more special, and they’ll brighten your day when you sit down for that cup of tea or coffee.
Fun fact: The Danish name for this kind of flaky, layered pastry is wienerbrød, which literally means “Vienna bread.” It’s a nod to the Austrian capital city. Legend has it that bakers from Austria brought their skills to France and Scandinavia centuries ago. Ironically, the Austrian name for a Danish is … kopenhagener.
Homemade Cherry Danish Ingredients
- Yeast: The active dry yeast and a slow overnight rise give the dough its light and soft texture. Double-check that your yeast isn’t expired, or it might not proof correctly.
- Milk: Warm milk contains enough moisture and natural sugars to activate and nourish the yeast. Be sure to warm it to 110° to 115°F to activate the yeast. Any warmer will kill the yeast, but any colder won’t proof it.
- Flour: All-purpose flour forms enough gluten to make a nicely elastic dough, but not so much so that it becomes tough.
- Sugar: Sugar is here in part to sweeten the dough, and also to help feed the yeast.
- Butter: Butter adds richness to the dough, but more importantly, it makes the Danish flaky. It also is the base for the icing. We use a lot of butter in this recipe, so I recommend buying the best butter (like European butter) for a quality, authentic flavor.
- Half-and-half cream: Half-and-half cream is the main liquid in the recipe. It makes the dough rich and soft, and is also used to thin the icing and make it smooth.
- Egg yolks: Like the cream, egg yolks (and the natural emulsifiers they contain) soften and enrich the dough. Separate the egg whites from the yolks, and save the egg whites for another recipe.
- Cherry pie filling: Cherry pie filling is already sweetened and thickened, so it makes a convenient filling for these pastries. You can normally find pie filling in the baking aisle at the grocery store.
- Confectioners’ sugar: Confectioners’ sugar is combined with butter and cream to make the icing.
- Vanilla: Vanilla brings its familiar, sweet and slightly complex flavor to the icing.
Directions
Step 1: Mix the dough

In a small bowl or measuring cup, dissolve the yeast in the warm milk. The mixture should start to become foamy and frothy within about 10 minutes.
In a large mixing bowl, combine the all-purpose flour, sugar and salt.

Cut in the butter until the mixture resembles coarse crumbs, as if you were making biscuits or pie crust. Add the yeast mixture, cream and egg yolks, and stir until the mixture comes together to form a soft, sticky dough. Cover the dough with storage wrap or a clean kitchen towel and refrigerate it overnight.
Step 2: Roll, cut and shape the dough

Punch down the dough. Turn it out onto a lightly floured surface, and divide it into four equal portions. Roll out each portion into an 18×4-inch rectangle. Cut it into 4×1-inch strips.
Take two strips and place them side by side, then twist them together. Shape the twisted dough into a ring, and pinch the ends together. Place the ring on a greased baking sheet and then repeat, spacing the pastries 2 inches apart.
Cover the pans with clean kitchen towels and let the pastries rise in a warm place until they’ve doubled in size. It should take about 45 minutes, depending on the temperature in your kitchen. (Dough will rise quickly in warmer kitchens and more slowly in colder kitchens.)
Step 3: Fill the pastries

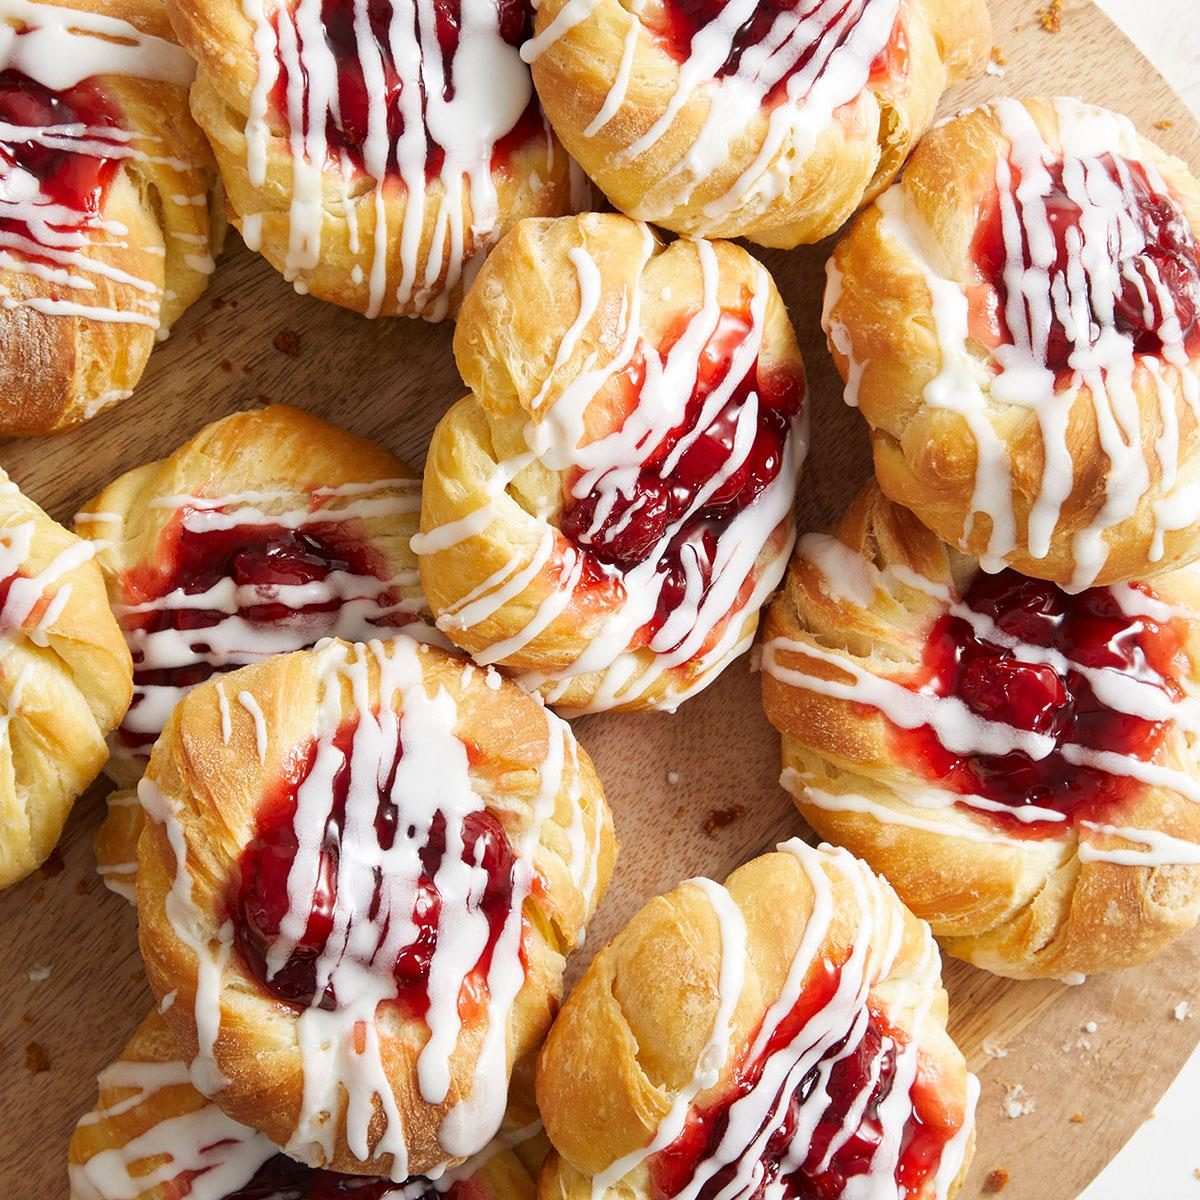
Preheat your oven to 350°. Using the handle of a wooden spoon, make a 1/2-inch-deep indentation in the center of each Danish. Fill each one with about 1 tablespoon of the cherry pie filling.
Step 4: Bake the pastries
Bake the Danishes for 14 to 16 minutes or until they’re lightly browned. Transfer them to wire racks to cool at room temperature.
Step 5: Ice the pastries

For the icing, add the confectioners’ sugar, butter, vanilla and salt in a mixing bowl. Add the half-and-half gradually while beating the icing until the icing reaches a smooth texture that flows nicely from a spoon. Drizzle the icing over the Danishes before serving them.

Homemade Cherry Danish Variations
- Prep a homemade filling: If you’re not a fan of store-bought cherry pie filling, go ahead and make your own. It’s not difficult, and it’s a definite upgrade. Fresh cherries are a great starting point when they’re in season, but frozen ones work well too. If you haven’t done it before, follow the steps in this cherry pie recipe.
- Make a more authentic dough: The Danish dough in this recipe is really good, but the classic roll-and-fold method (“laminating” the dough) yields flakier results. It’s a little more work to make it this way, but it’s not particularly tricky. It just takes patience. For a visual guide, take a look at our recipe for a Wisconsin-style Danish kringle.
- Turn the recipe into a kringle: In fact, any time you’re expecting company, consider turning your batch of individual Danishes into a single ring-shaped kringle with cherry filling. Use this recipe’s dough or the classic version; either will work. The dough in this recipe will make roughly three kringles, so cut it into thirds instead of quarters and proceed as shown in the kringle recipe.
How to Store Homemade Cherry Danishes
Once the icing has set, any uneaten Danishes can be transferred to a food-safe storage container with an airtight lid. If you layer them, place a sheet of wax paper or parchment paper between each layer to prevent them from sticking.
How long will homemade cherry Danishes keep?
Most Danishes will keep for at least three days at room temperature, because the rich dough maintains its texture pretty well. If you refrigerate them, they’ll quickly lose that just-baked softness, but they’ll stay safe to eat for at least twice as long. Gently reheat them to refresh their texture.
Can I freeze my homemade cherry Danishes?
Yes, you can freeze homemade cherry Danishes. This recipe makes a big batch, and freezing them is an easy way to always have treats on hand. Just don’t frost them until they come out of the freezer. Freeze the Danishes on a parchment-lined sheet pan. Once they’re frozen, pack them into freezer bags or freezer-safe storage containers. They’ll keep best when they’re vacuum-sealed or individually wrapped before they go into bags or containers. They’ll maintain their flavor for up to three months, depending on how well you wrap them.
Homemade Cherry Danish Tips

Can I use a store-bought convenience dough instead?
Yes, you can use store-bought convenience dough instead. Store-bought puff pastry is one option, and in fact some of the other Danish recipes on our site call for it. Canned crescent roll dough is another good choice. Like puff pastry, crescent roll dough isn’t sweetened, but the filling and icing make it sweet enough. Look for the oversized crescents if you can find them, or, better yet, look for a sheet of uncut crescent-roll dough. Cut it into 4-inch strips, and proceed from there.
Isn’t Danish dough supposed to have cardamom in it?
Well spotted! Yes, cardamom is a much-loved ingredient used in many Scandinavian desserts, including Danishes. It has a unique flavor, with hints of pine, citrus and mint. If you’d like to add some, you can add a small amount to the dough—about 1/2 teaspoon for a batch this size.
Can I use other fillings in my Danishes?
Yes, you can use other fillings in these homemade Danishes. Any prepared pie filling is an easy substitution, so you can replace the cherries with blueberries, strawberries or anything else that appeals to you. Good-quality jam makes an easy filling option, as well. If you want to go old-school with a prune filling or cheese filling, you can crib those from our other Danish recipes.